How It Works
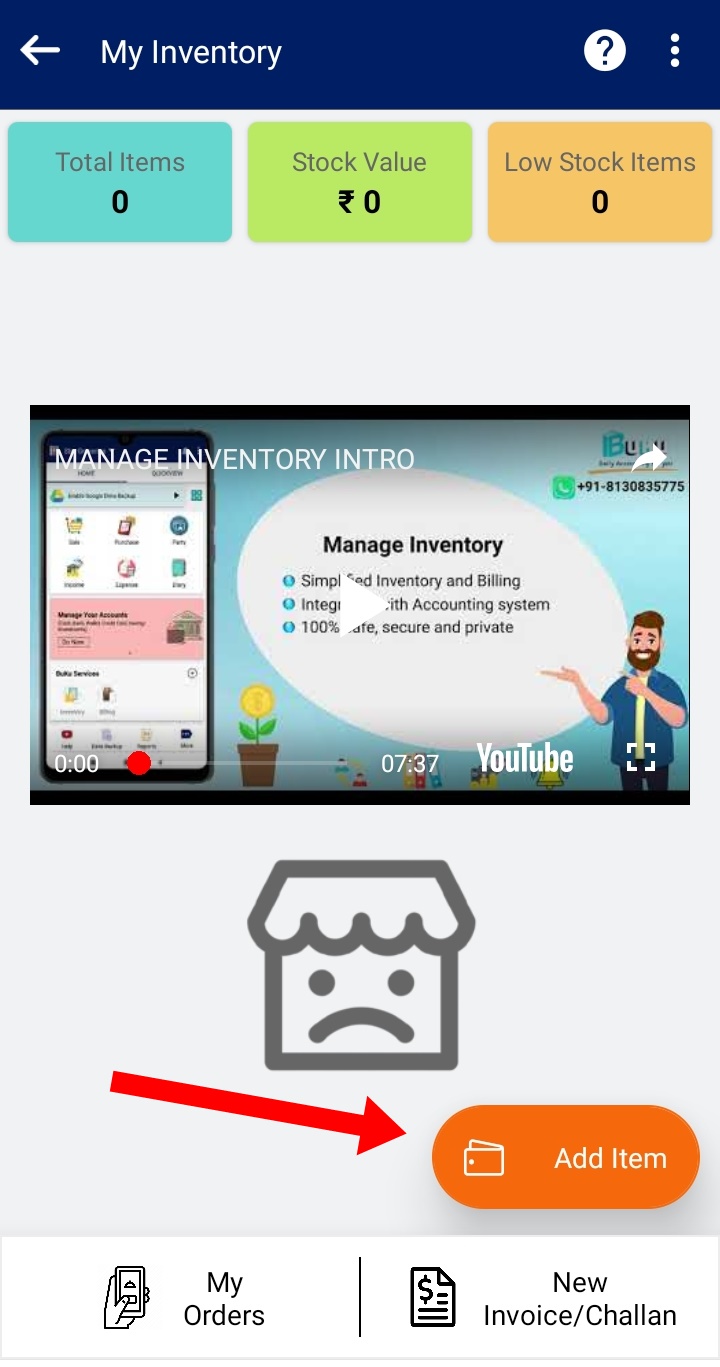
Make your business digital with Buku Inventory Management Module. Click on the Add Item button for adding your products in inventory with details like product image, brand, category, Buying & Selling price, Minimum order & Re-Order qty etc with tags like clearance sale.
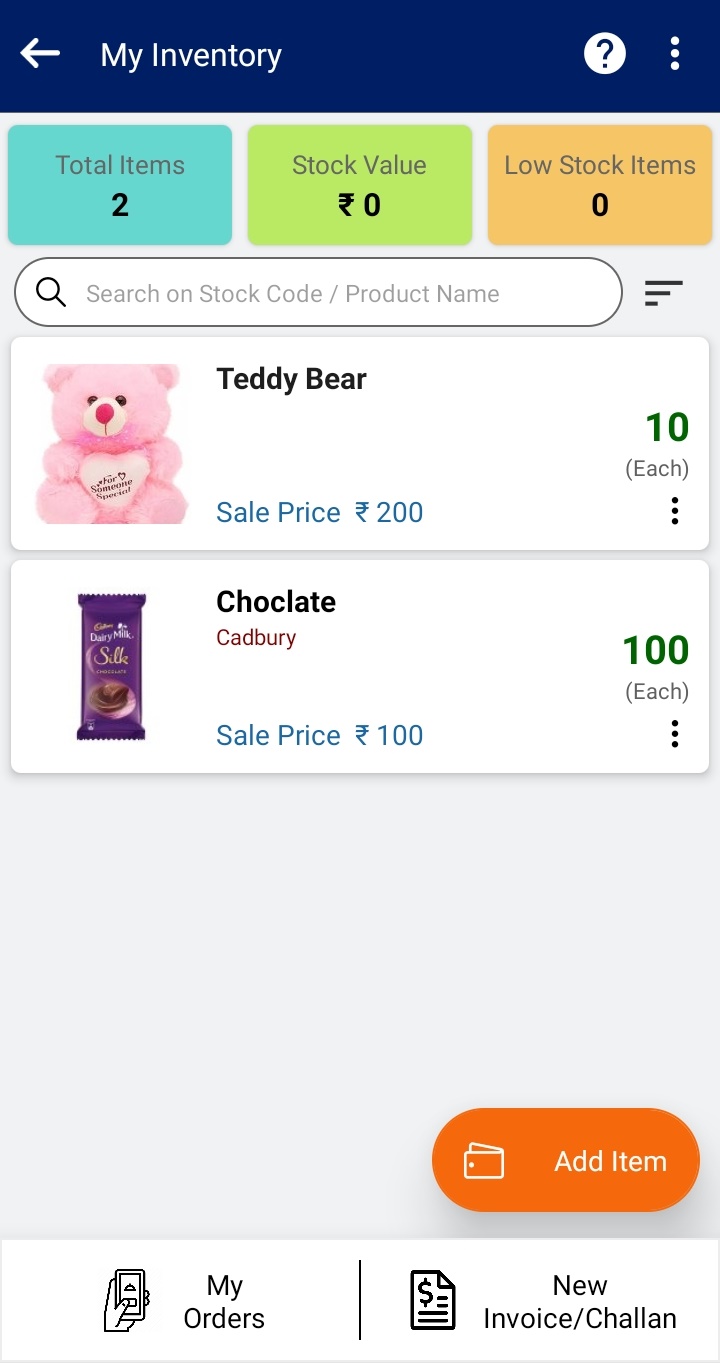
The products added will be shown the listing.
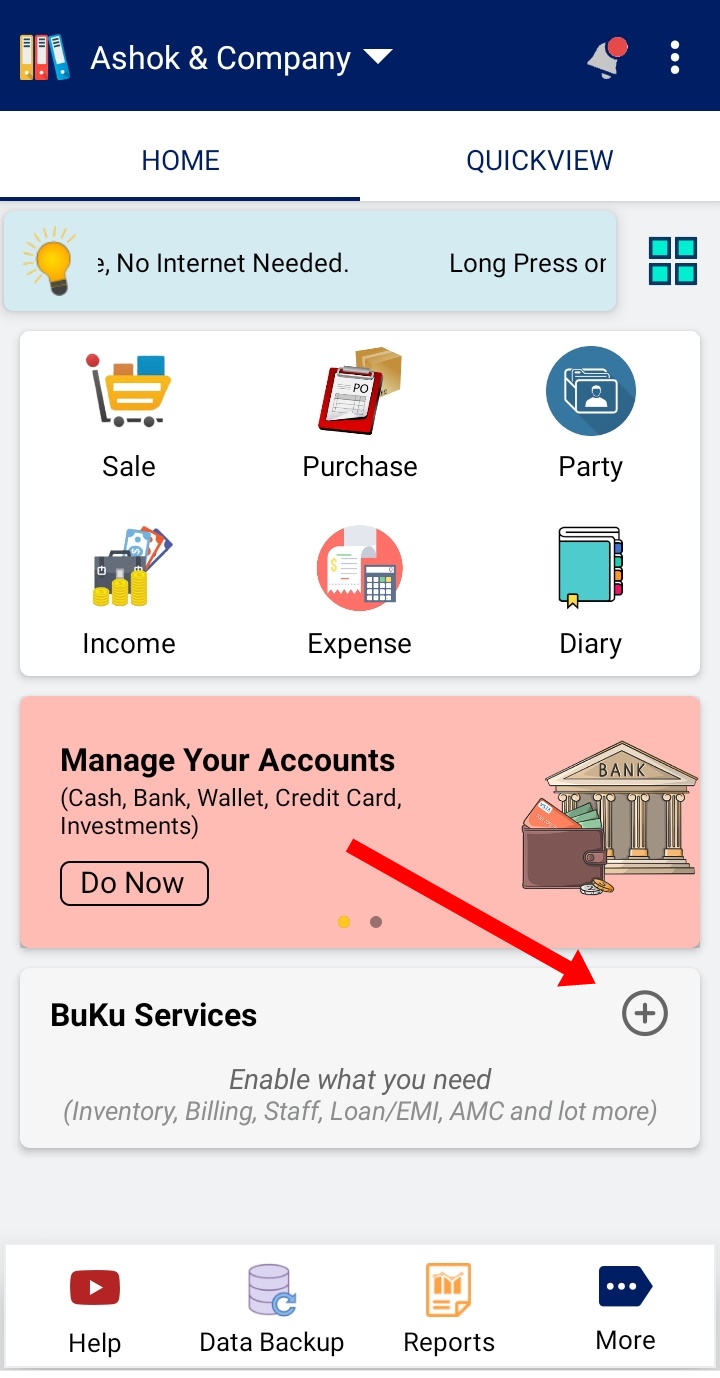
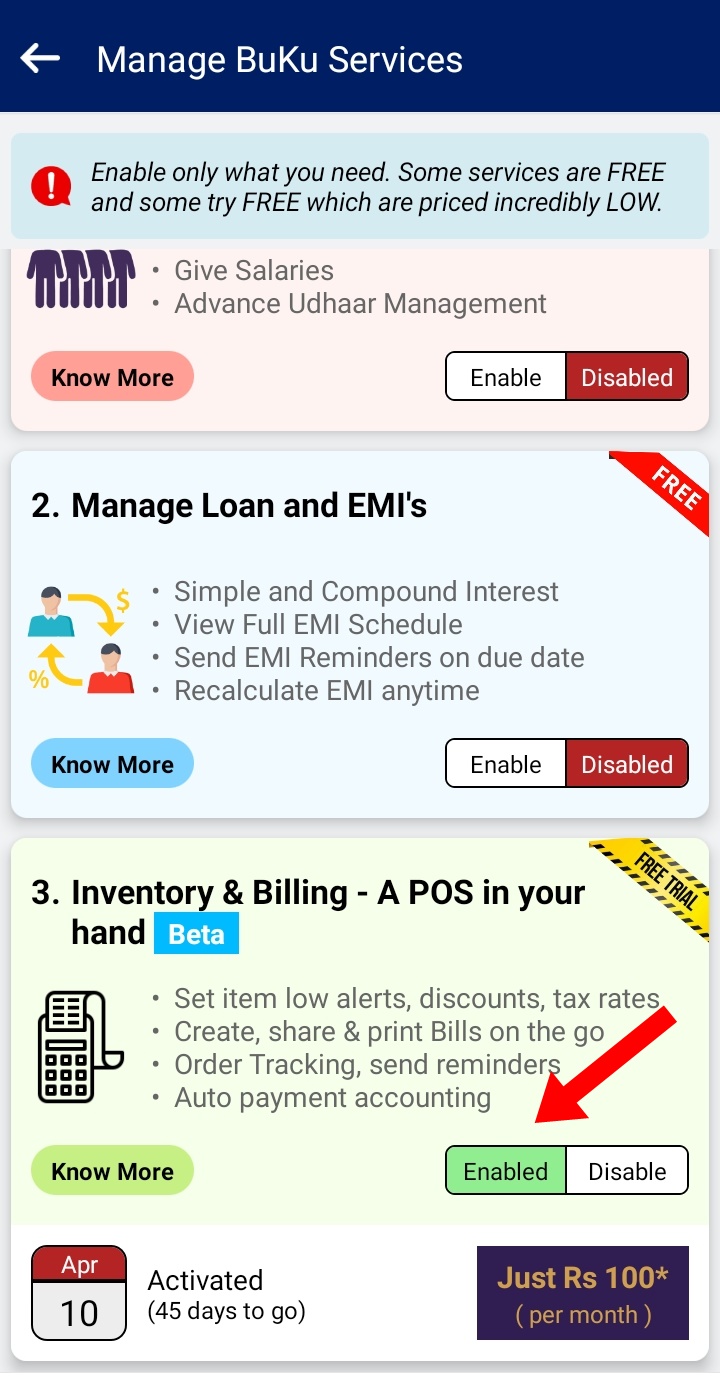
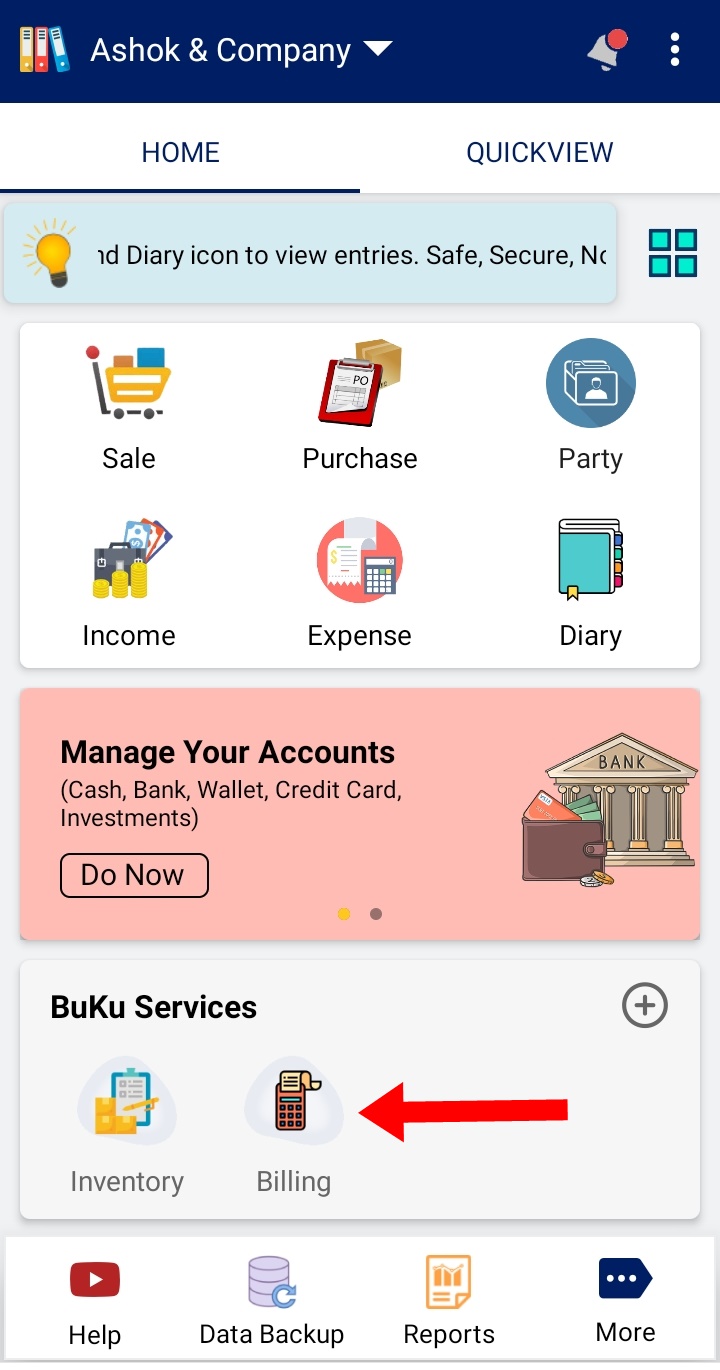
Enable Inventory & Billing Feature
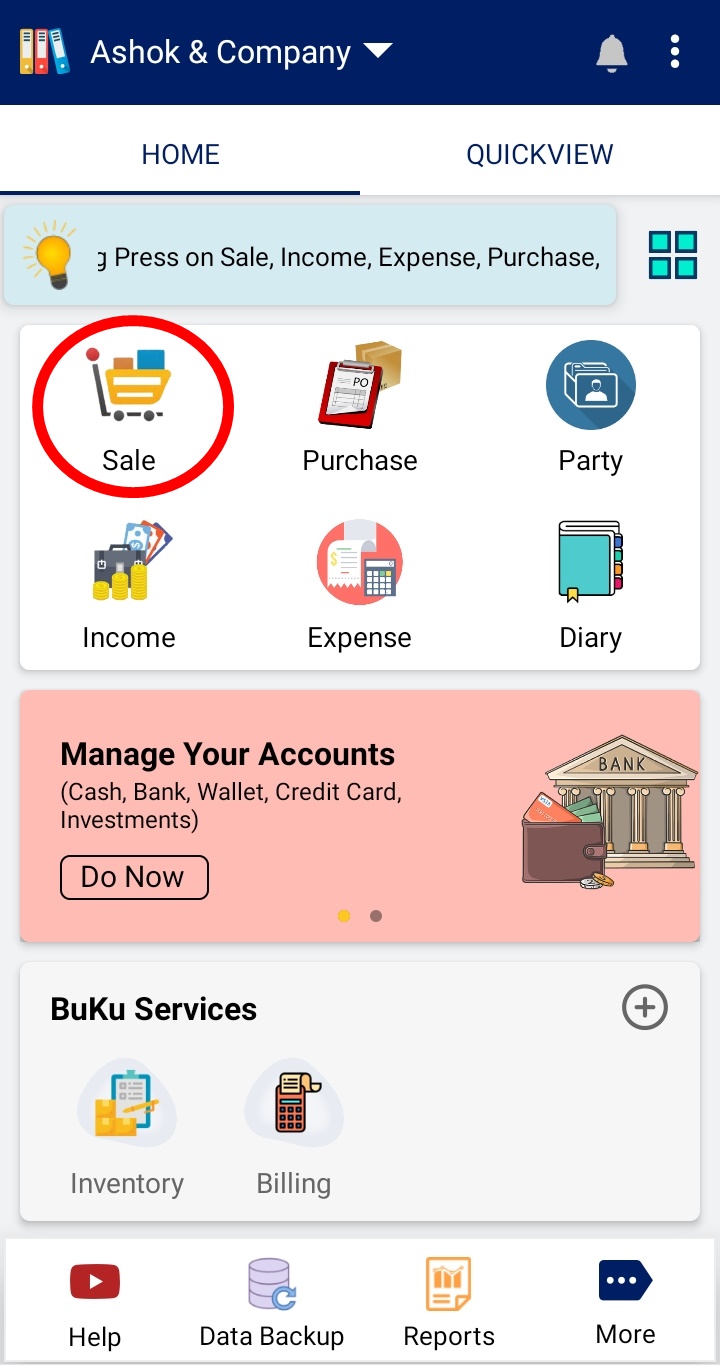
On the Home Screen, From BuKu Services box, click on + icon
Add Item
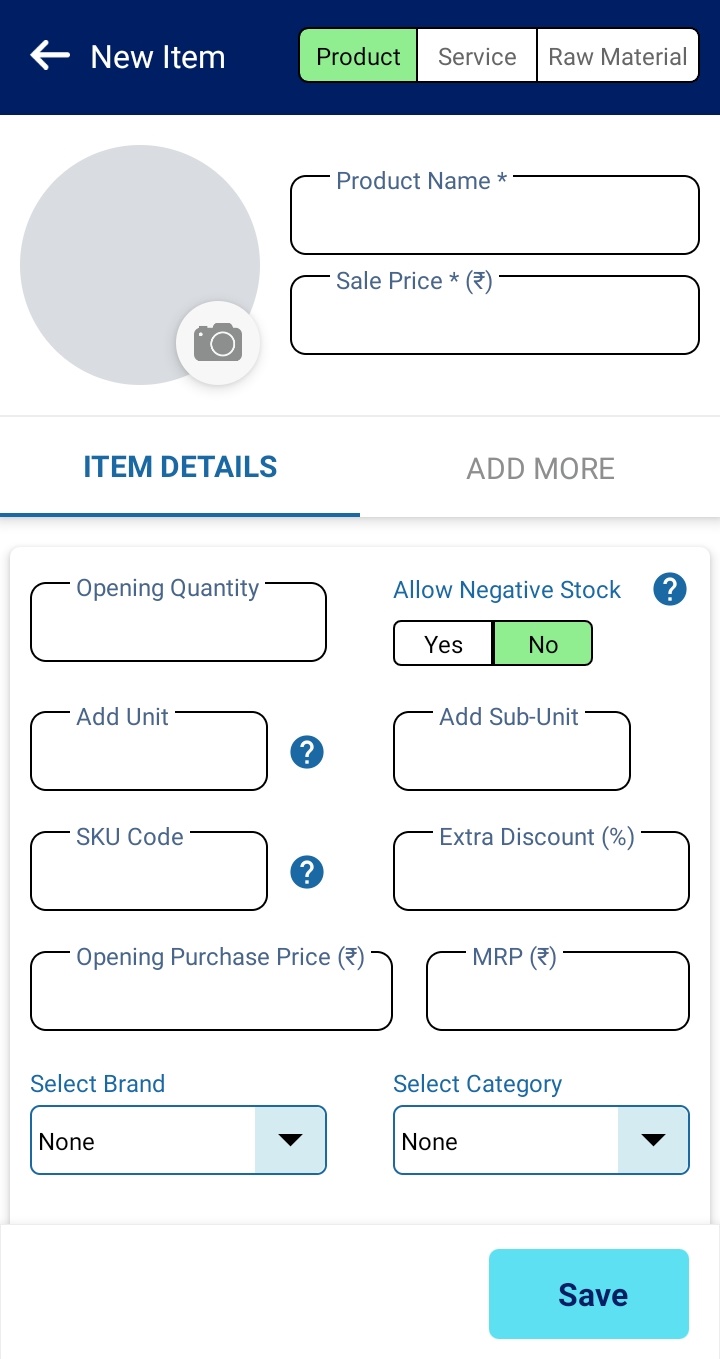
Only three fields are mandatory for adding items
- Product Name
- Product Selling Price
- In Stock Qty
You can also scan the barcode of the product (which comes pre printed on the item from manufacturer/brand).
Recommendation - You can also create your own SKU code for your items. We recommend that you assign your own SKU code ( like part numbers) for easy reference. E.g. It could be as easy as Item1, Item2, Item3 etc.
Please note - In the next App update, you will be able to generate your own barcode and print on a label printer for your own stock keeping.
You can define your own Brands, categories, Unit, Subunit for proper Item classification and book keeping.
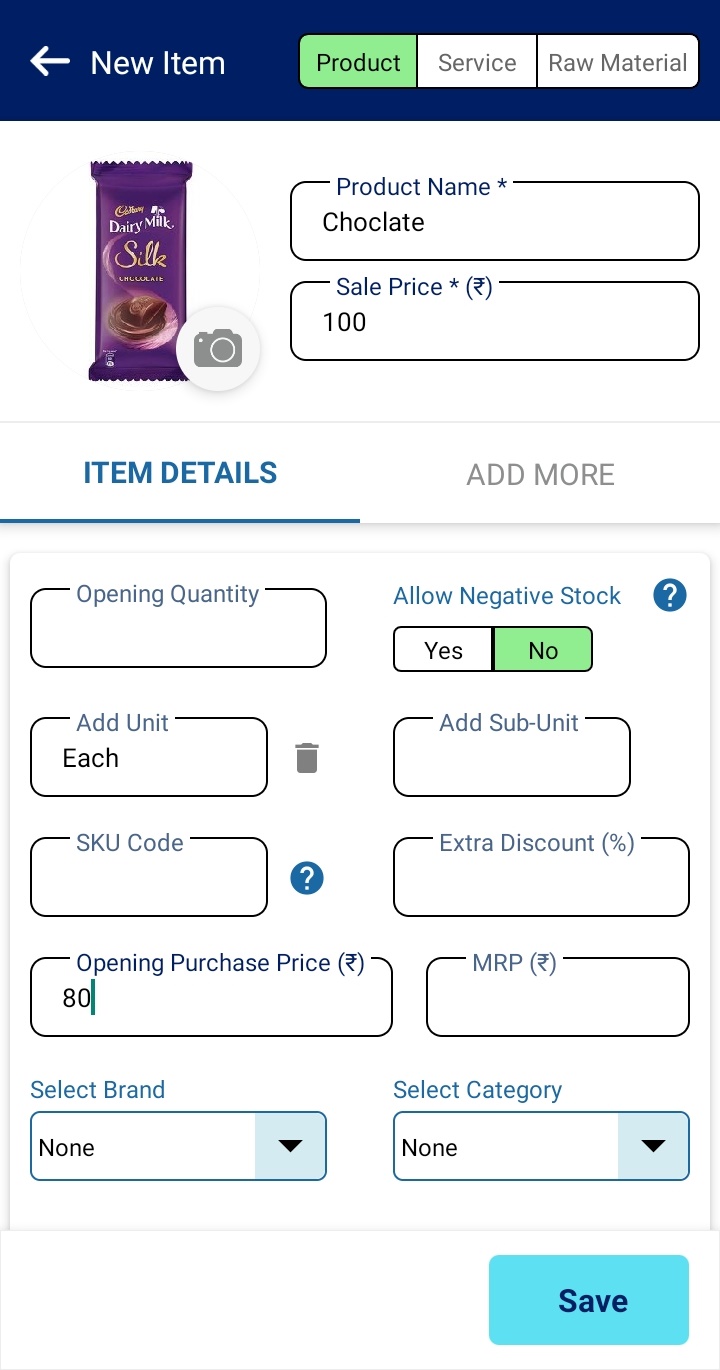
Unit and SubUnits
1. Unit as Pack of 4 and Subunit as 125 gm
2. Unit as Pack of 4, 125 gm each
Example 2 – Lets say you have an item Plastic Grocery Container, 23-Pieces, Red color. So the two options, you have to create this are :-
1. Unit as Pieces and SubUnit as 23
2. Unit as 23 Pieces
If you want to maintain color wise inventory then you can also do
1. Unit as Pieces and SubUnit as 23, Red
2. Unit as 23 Pieces, Red
3. Unit as 23 Pieces and SubUnit as Red color
Example 3 – Item is Amazon Brand - Vedaka Popular Whole Almonds, 200g. So, you should create this as :-
Unit as Pouch and SubUnit as 200 gm
Example 4 – Item is Dabur Honey. So the two options, you have to create this are :-
Unit as Bottle or Jar ( as you feel) and SubUnit as 1 kg
Example 5 - English Oven Burger Buns 6Pcs, 300 g
Unit as Pack and SubUnit as 6 pcs, 300g
Example 6 - iD Instant Filter Coffee Liquid | Strong | Authentic, Ready to use | 60 Cups | 600ml (150 x 4)
Unit as Pack and SubUnit as 600 ml ( 150 x 4)
Example 7 - Tide Ultra Matic Detergent Washing Powder - 2 kg + 1 kg Free = 3 kg
Unit as Bag/Pack and SubUnit as 2 kg + 1 kg Free
Example 8 - Pepsi Soft Drink, 750ml Pet Bottle
Unit a Pet Bottle, SubUnit as 750 ml
Example 9 - Xiaomi Mi 10i 5G
Unit as Each and optionally you can set SubUnit as 4 GB, 64 GB
Example 10 - Pepsi Light 330ml, Pack of 24 Cans
Unit as Pack, SubUnit as 24 Cans, 330 ml each
We recommend that you use generic Unit like Pieces and the rest of details in Sub Unit. It will be easier to manage Units and Subunits.
Add Stock of an item
After the items are created, You would want to add more quantity of the item (which you purchased/manufactured)
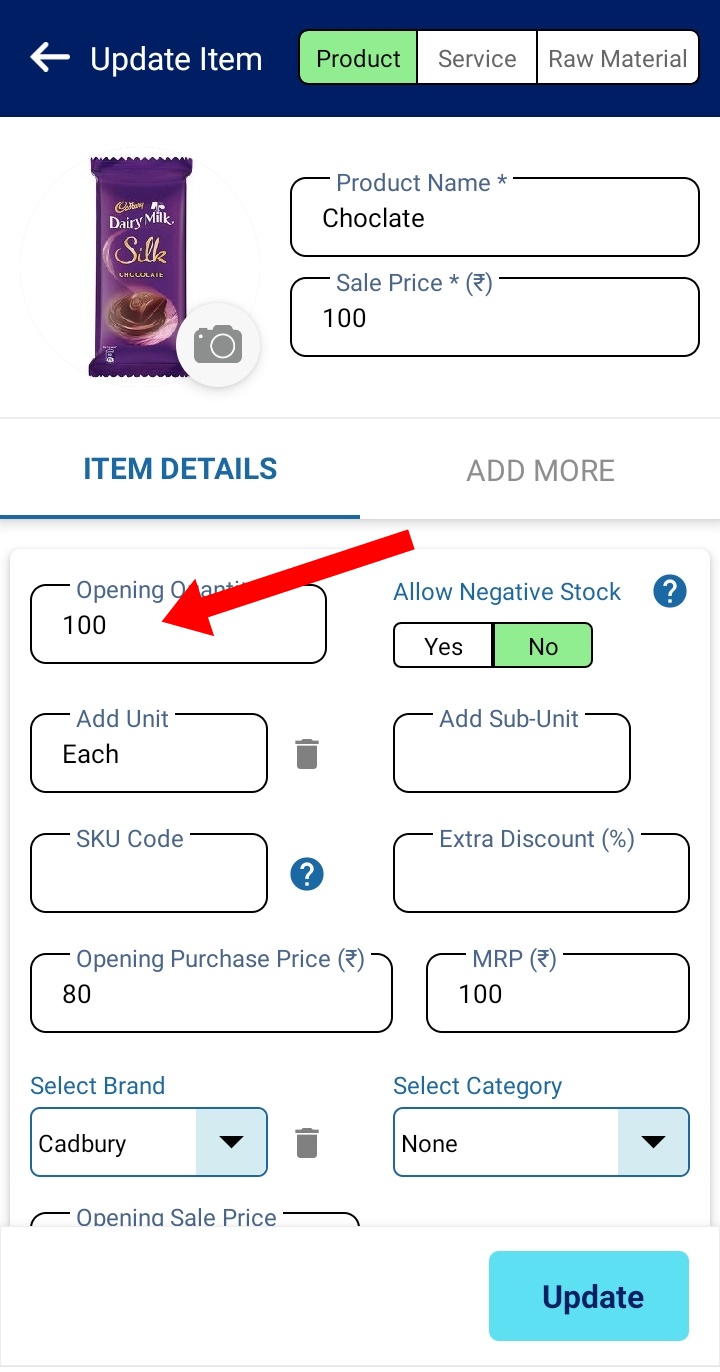
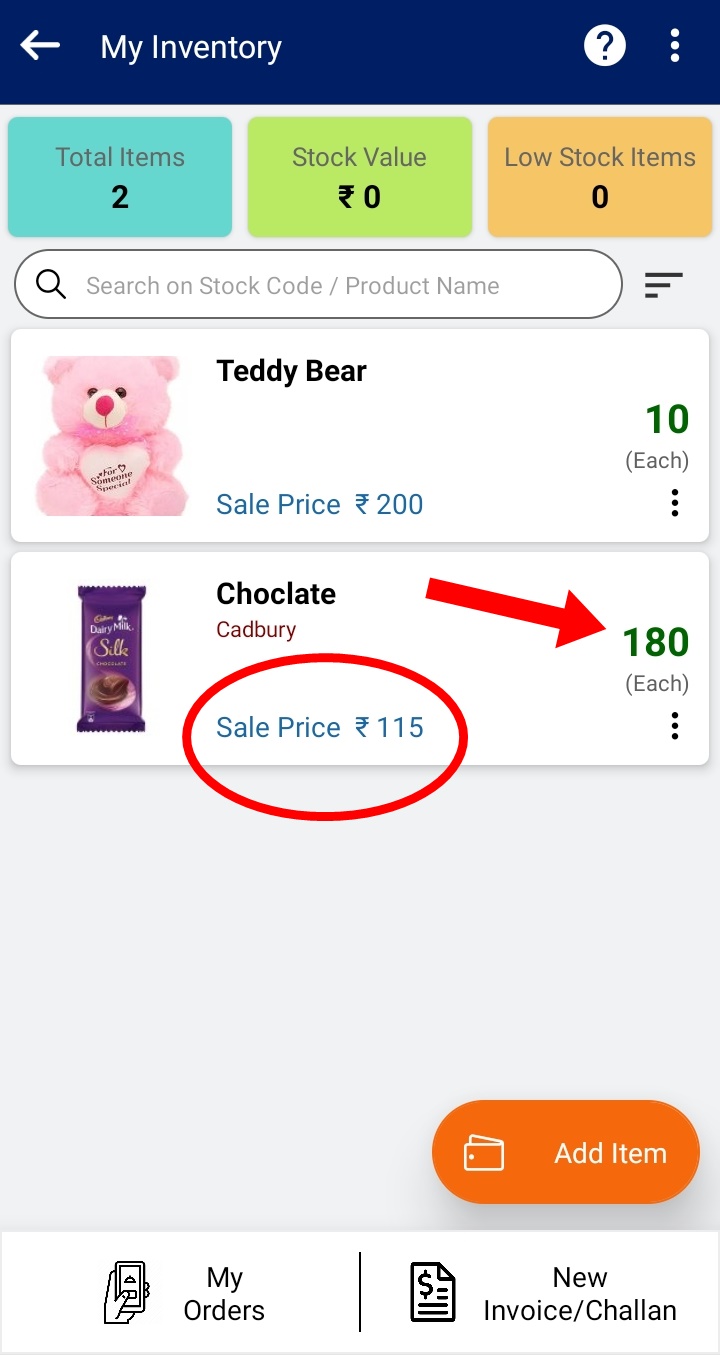
Tap on the + icon next to Item and you will see a pop up to add Purchased Item Qty. You can also set New purchasing cost and new selling price here.
Add Purchase entry for this item or bunch of items
There are two ways of doing it.
Option 1
Since you have purchased the items, you would also want to create the Purchase entry so that you can also do the accounting. For example, you buy a certain item from Supplier XYZ and you would want to keep track of all purchases from him. It is possible that you might be purchasing on credit and pay him later. Or you have paid him some amount and rest you would pay later. All this can be managed in BuKu.
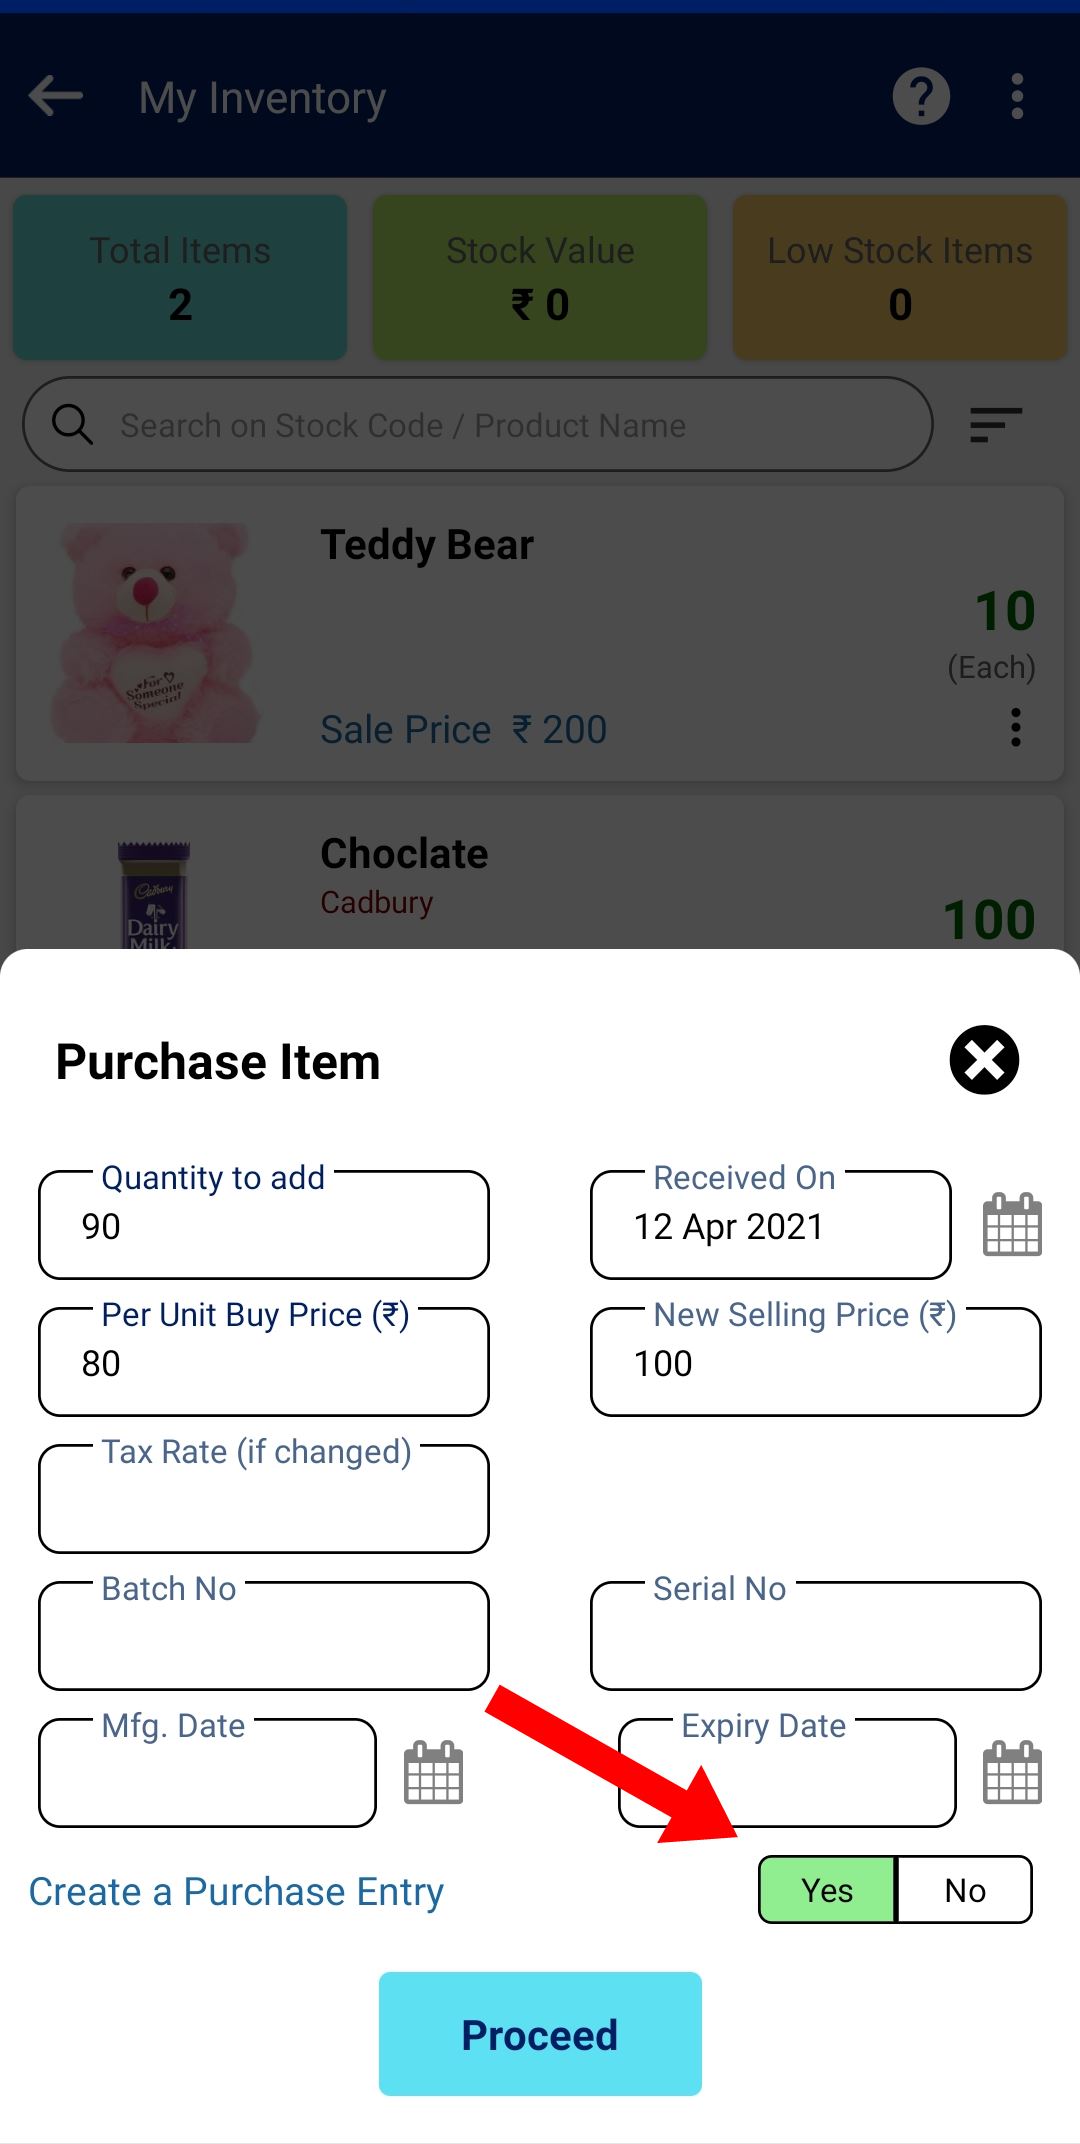
Tap on Yes button and you will see option to select Supplier and total purchase price (which is auto calculated as Qty * per unit buy price). But you can change this amount as you may have bought more items in a single purchase or there may be other expenses in the bill like shipping etc.
This place is actually just a quick shortcut to add Purchase. I will explain the proper place to manage your purchases later in this help tutorial.
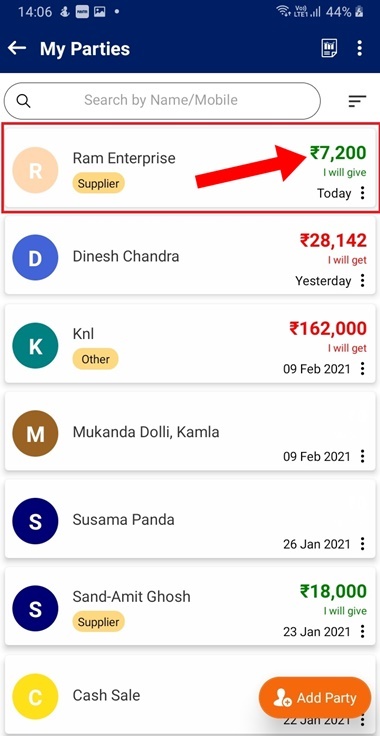

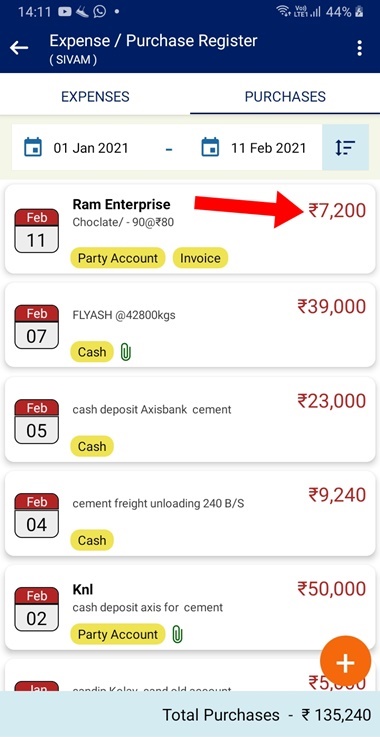
This entry is made as Credit purchase i.e. you owe your supplier Ram Enterprise Rs 7200 It is also Visible in your Purchase Listing (Home Screen -> More Button ->Expense/Purchase Register) If you have paid him this amount then you can create a I Gave ->Advance/Repayment entry
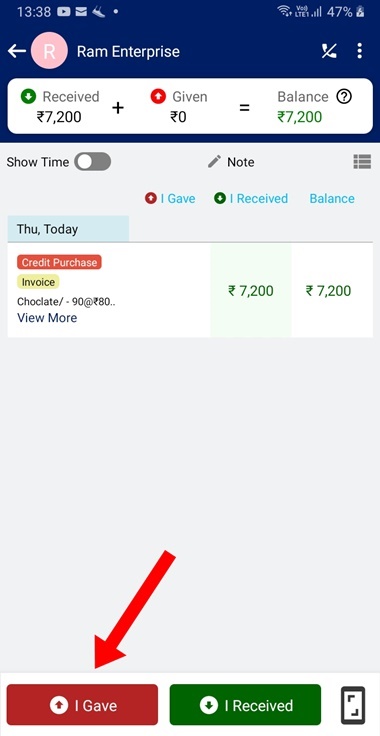
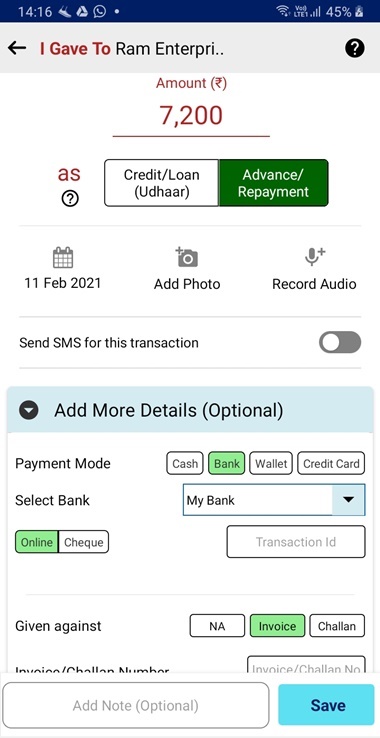
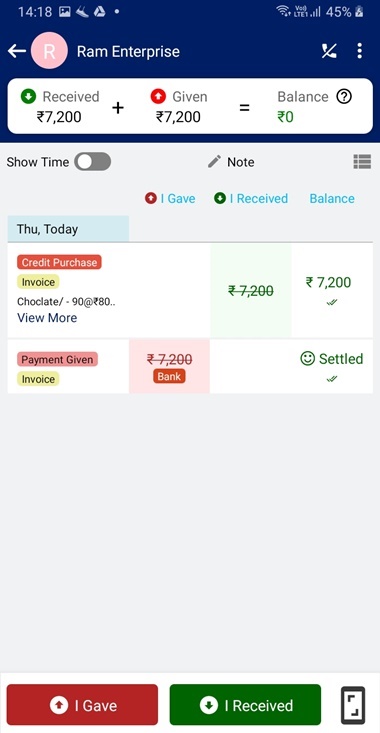
You can add Bill photo, change date, select mode of payment ( Cash/Bank/Wallet). After the entry is saved, the balance payable is 0 now.
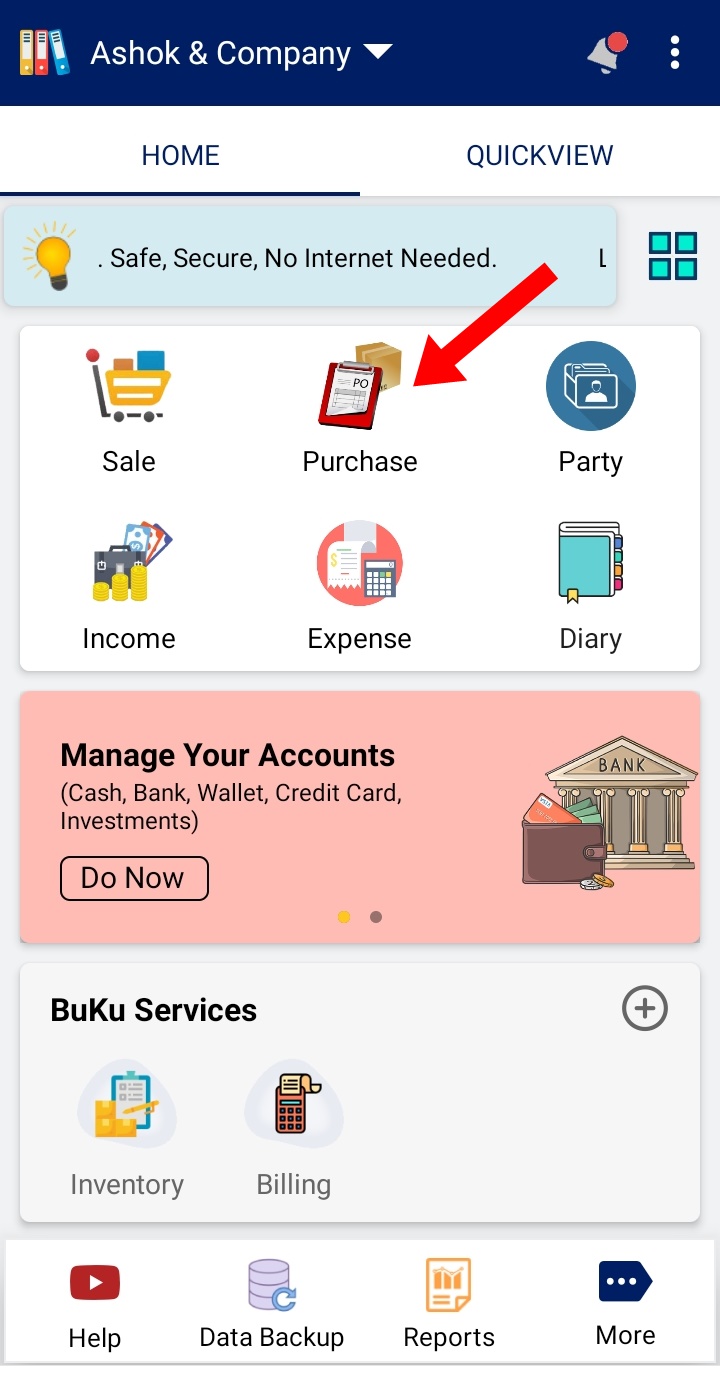
Option 2
Go to Home screen and tap on Purchase Icon.
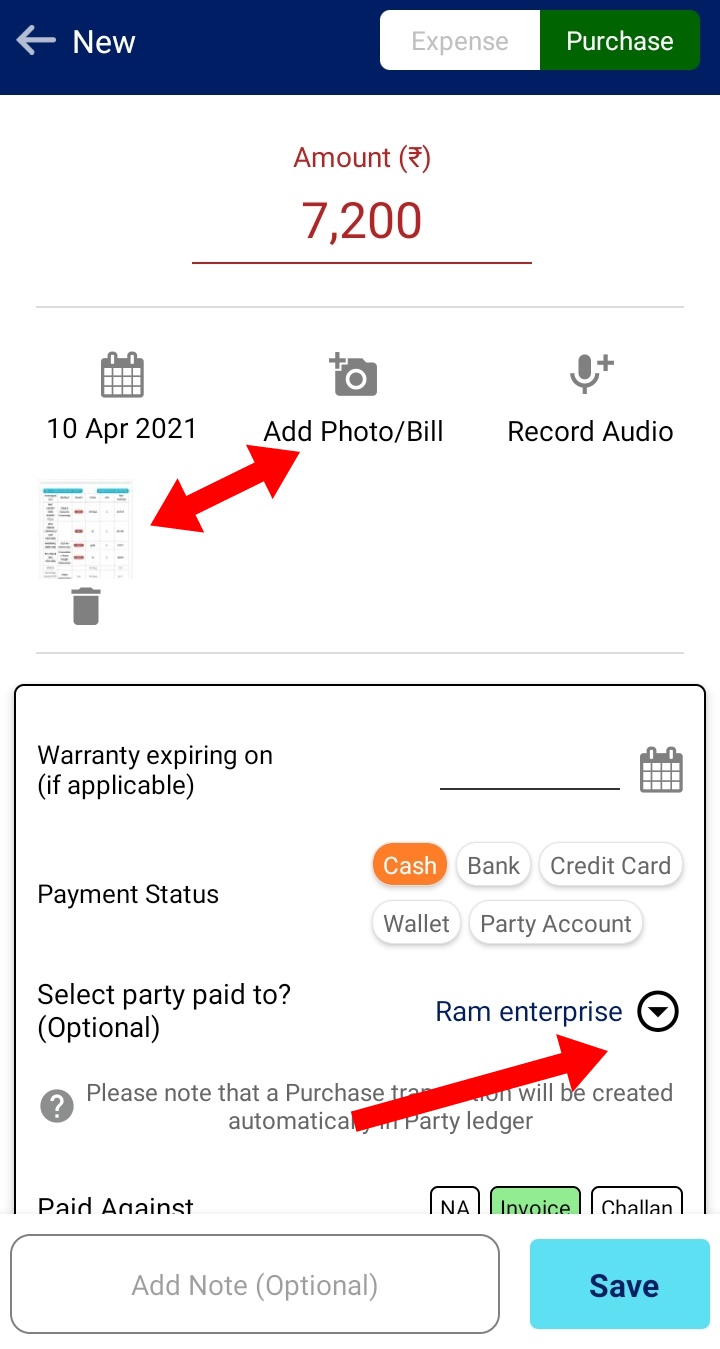
On this page, enter amount, attach bill photo/pdf, select supplier, mode of payment. If you have to pay later ( i.e purchased on credit) then select Party Account button.

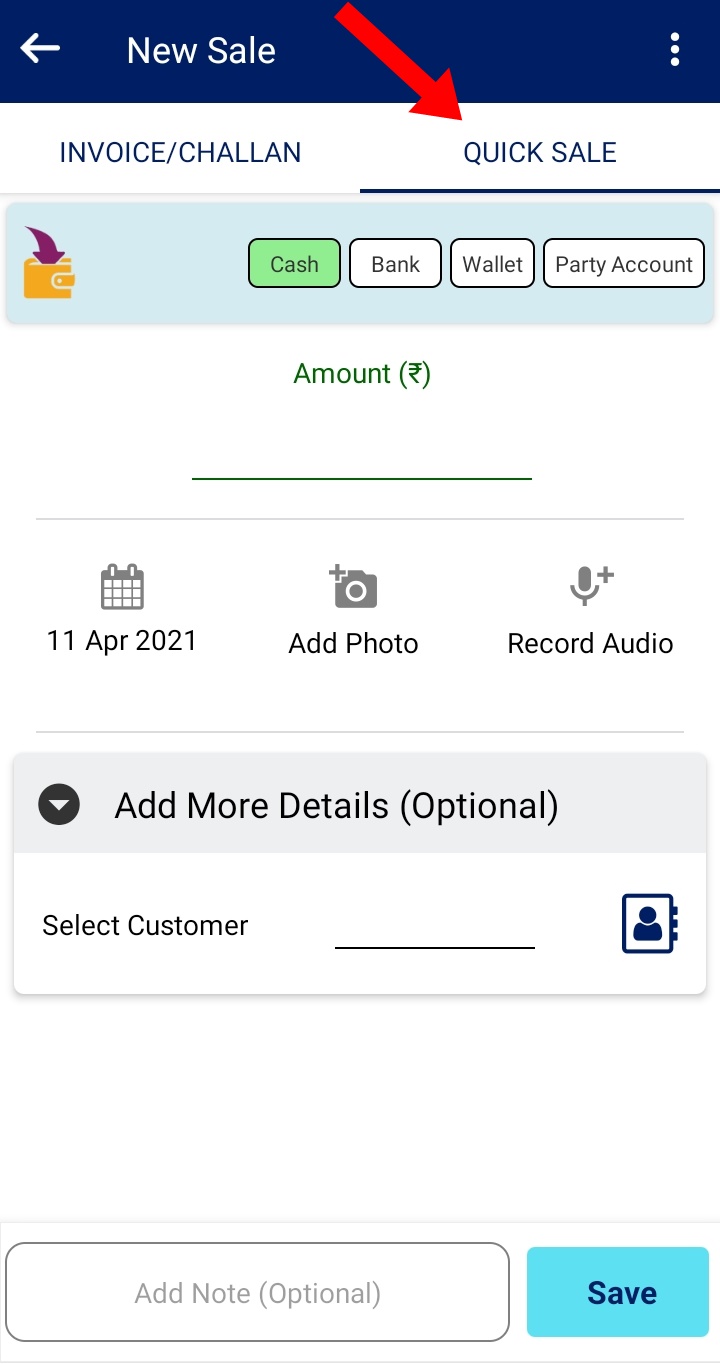
If you want to make sales without an item-wise bill (i.e. just want to maintain the sale amount), you can do this.
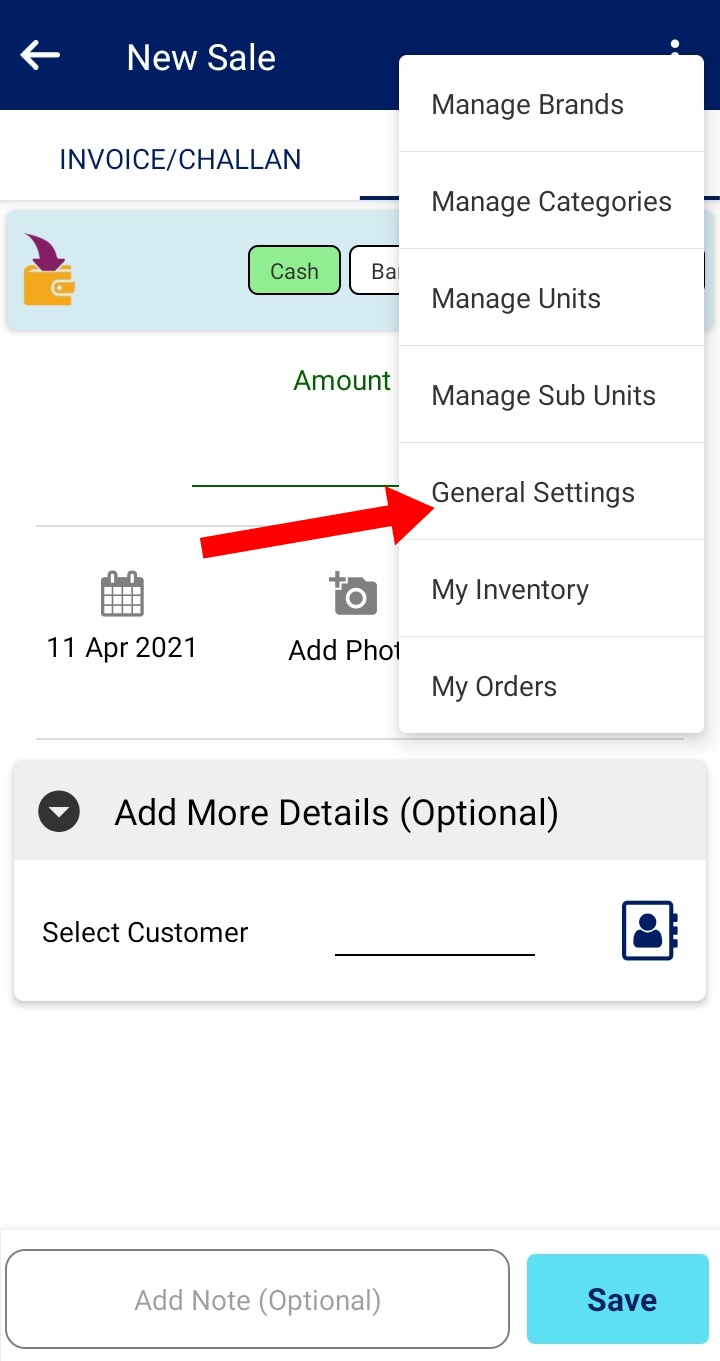
If you want to do Inventory linked sale/billing, then you have to set the billing settings.
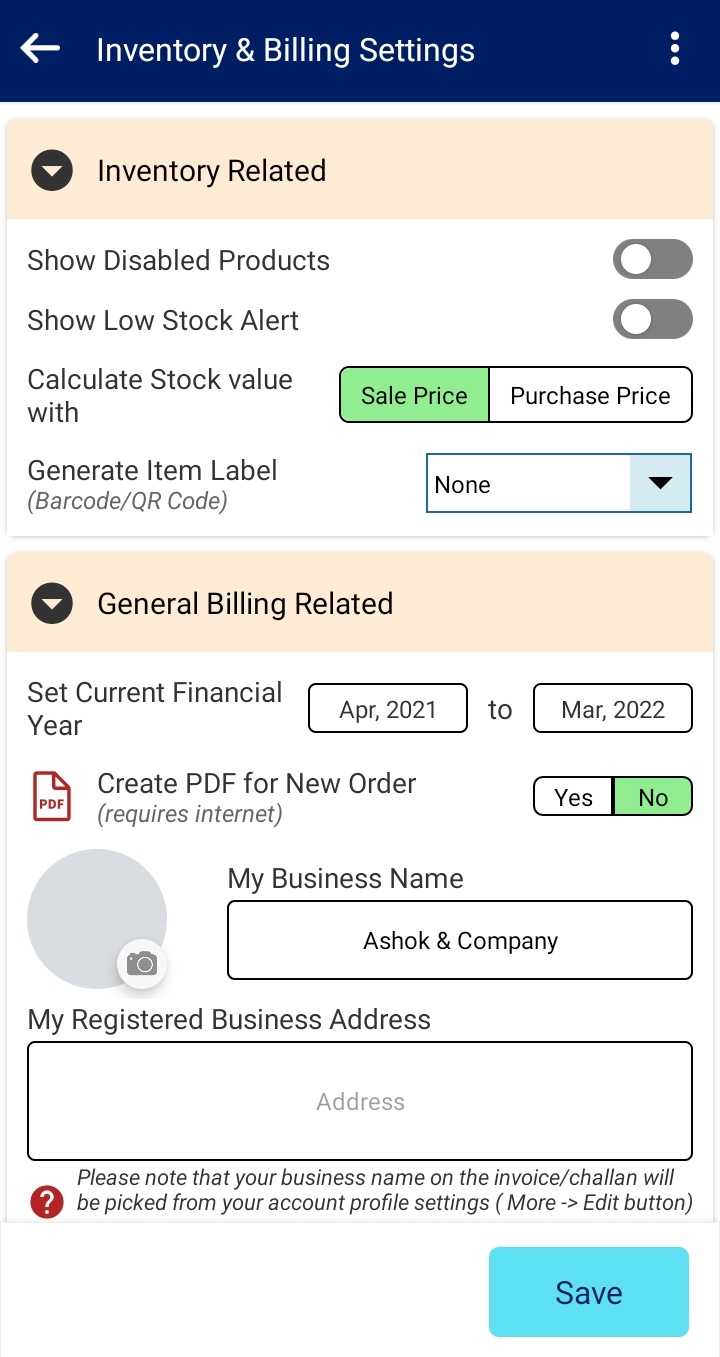
In the settings, you can specify your Business Name, Business Logo/Photo, Business Address. You can also set your Financial year which you follow e.g. In india, 1 April 2020 to 31st March 2021 is considered one financial year. In many countries, 1st Jan 2020 to 31st Dec is considered one financial year.
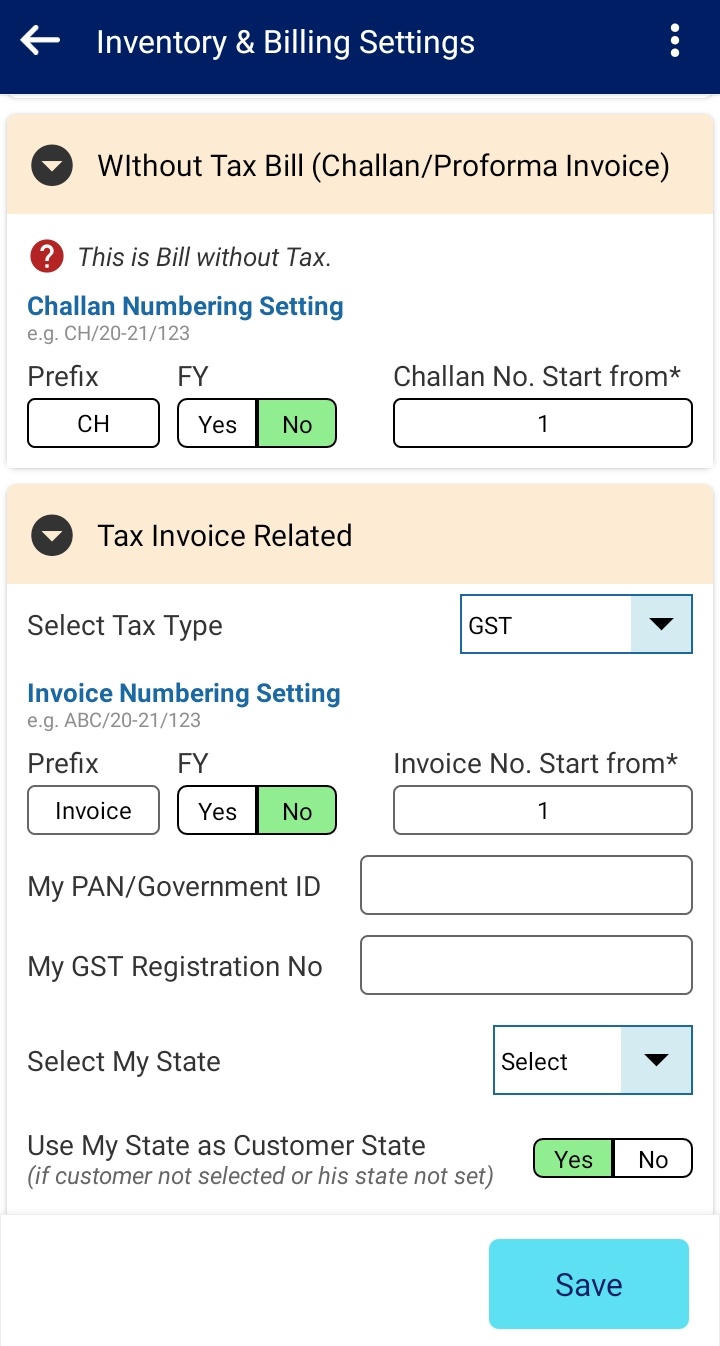
There are two types of bills which you can create
a) Bill with Tax i.e. Tax Invoiceb) Bill without Tax i.e. Challan
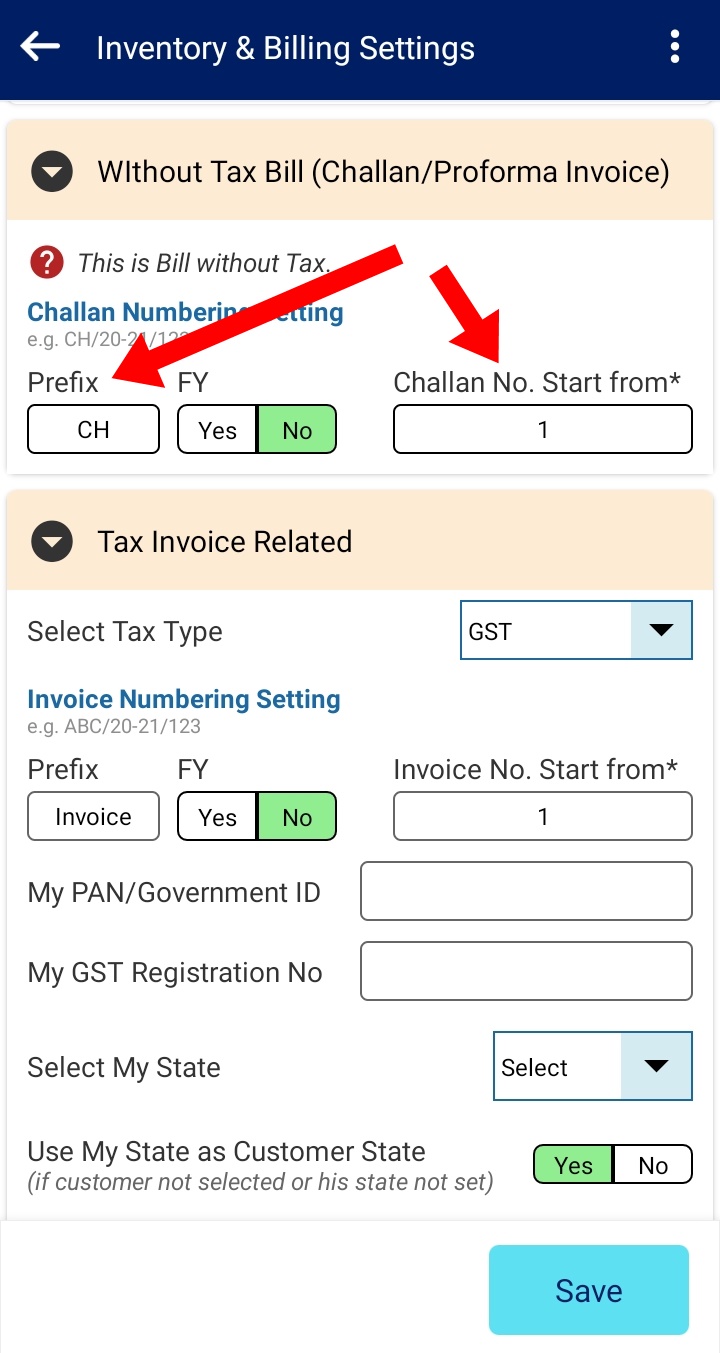
BuKu Billing system generates a unique bill number for each bill. You can specify your starting number for each of the bill type. If Tax Invoice is not applicable then you can leave that blank.
The Prefix is basically any 2 to 3 letter word which you want your bill to start from.
Lets say you chose CH as the prefix, Apr 20 to Mar 21 as Financial year and 1 as the starting bill number. So your first bill number will look like CH/20-21/1
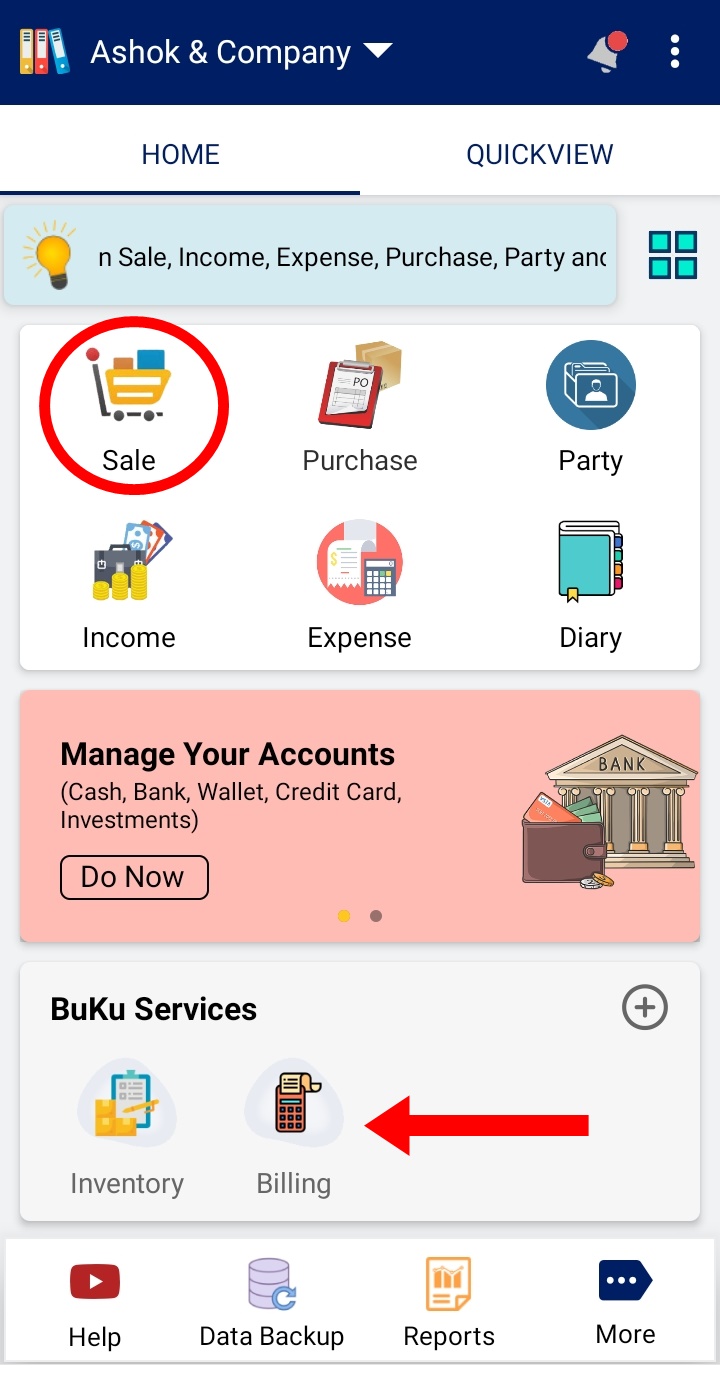
Create a New Challan for your sale ( i.e. Bill without Tax)
You can tap on Sale icon or Billing Icon (under Billing services).
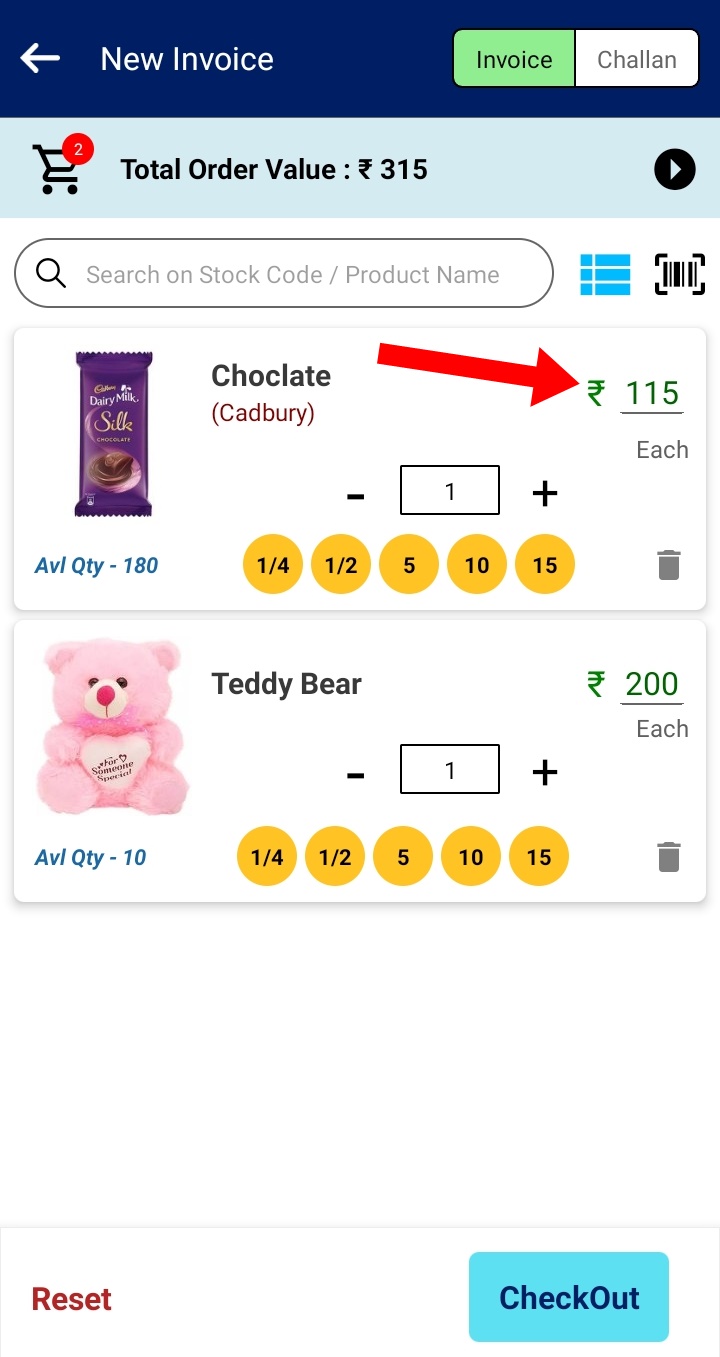
You will see the List of all items in your inventory with Selling price and Available Qty. You can also change the selling price for this order if you wish. Tap on + and – buttons to set the quantity. You can tap on the qty textbox to use keyboard also to set it.
If there are too many items, you have added and the list is long, you can search by item name or stock code from the search bar. You can also filter item list on Brand and Category by tapping on the black circle with arrow on top right.
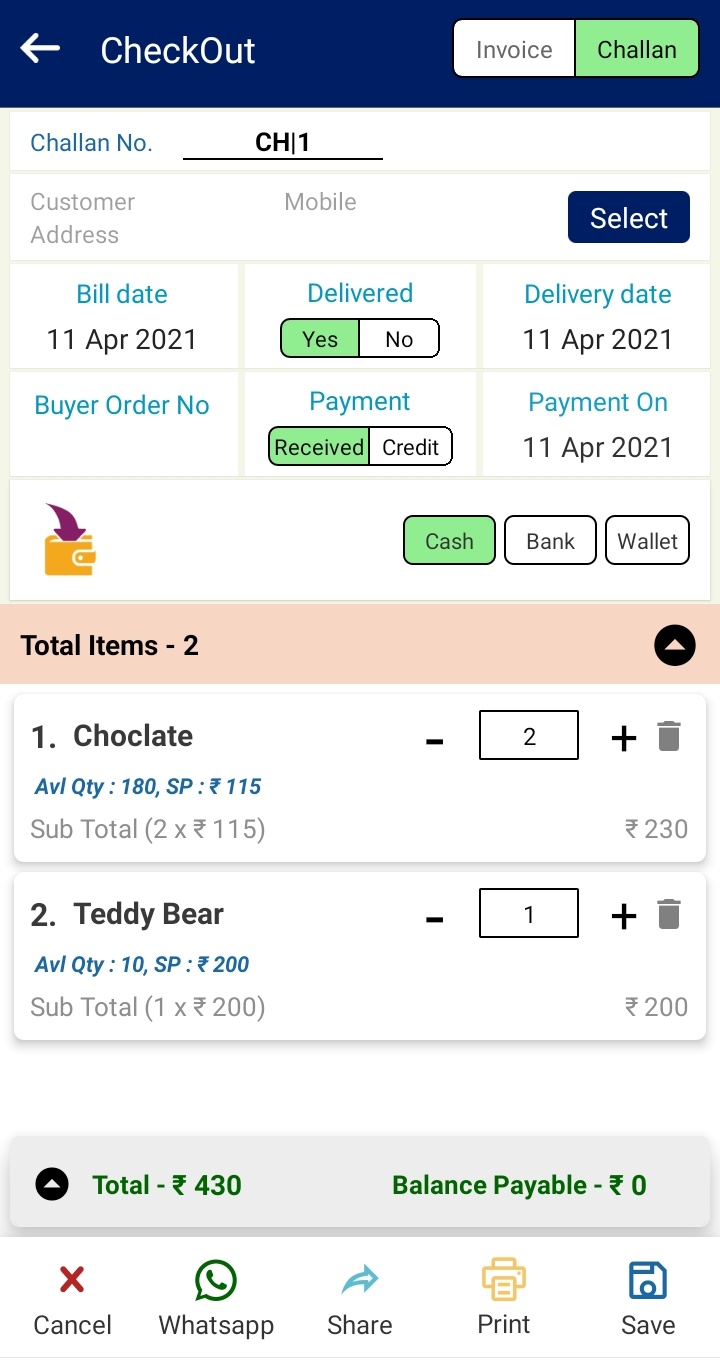
After this is done, tap on Checkout button and you will be taken to the next screen where you can select the customer, payment mode, delivery status ( e. g if this is over the counter sale, tap on Delivered yes button). Select the customer.
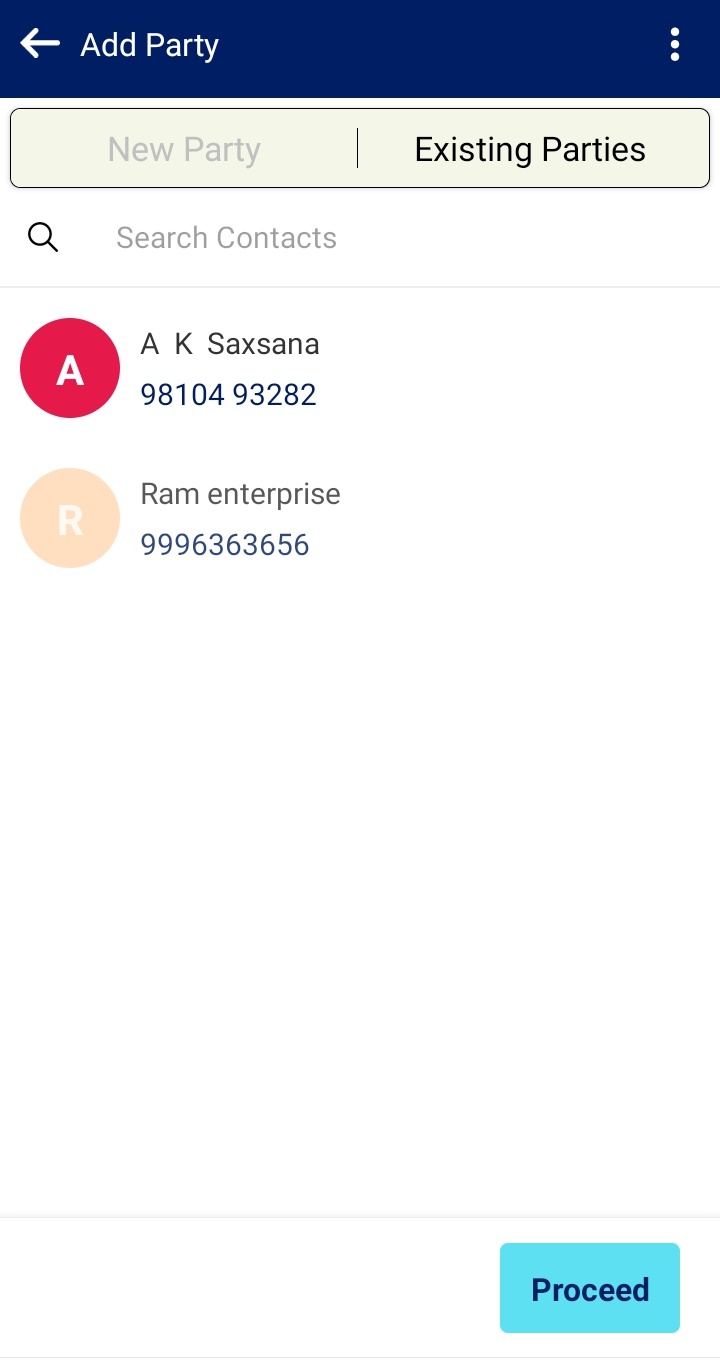
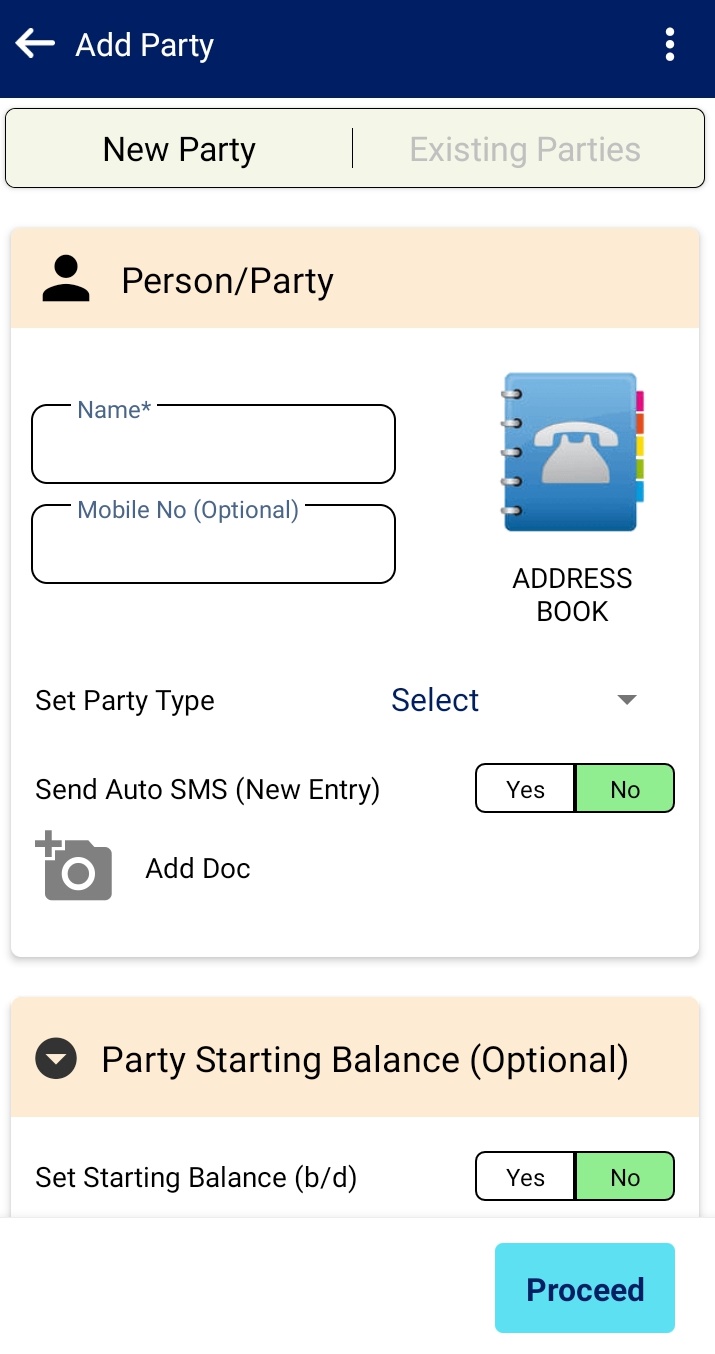
Here selecting customer is mandatory. If you do not want to keep track of individual customers ( like a stranger comes and buys from you) then we suggest to creating a party with some name say Counter-sale and select that for all bills. This sale will also be added in the Customer Ledger and Sale register

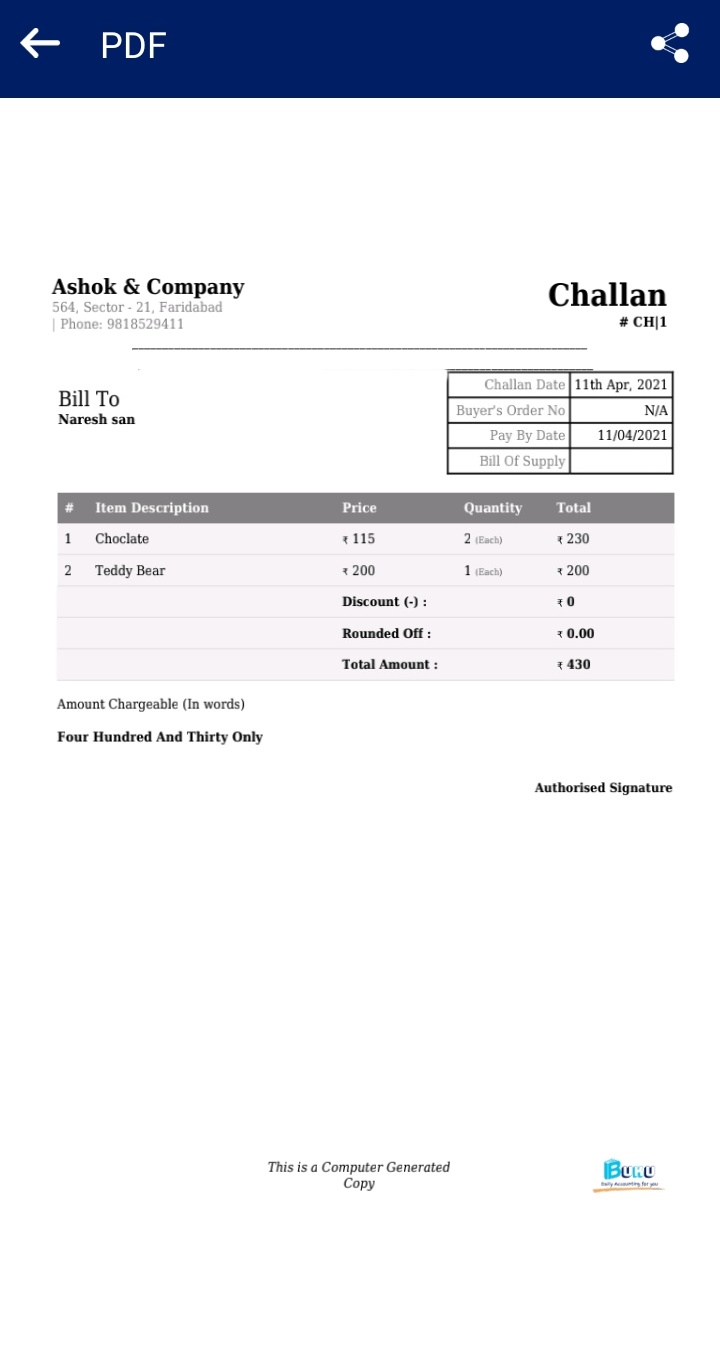
After the bill is created, the inventory count of the items sold will be decreased by the sold quantity.
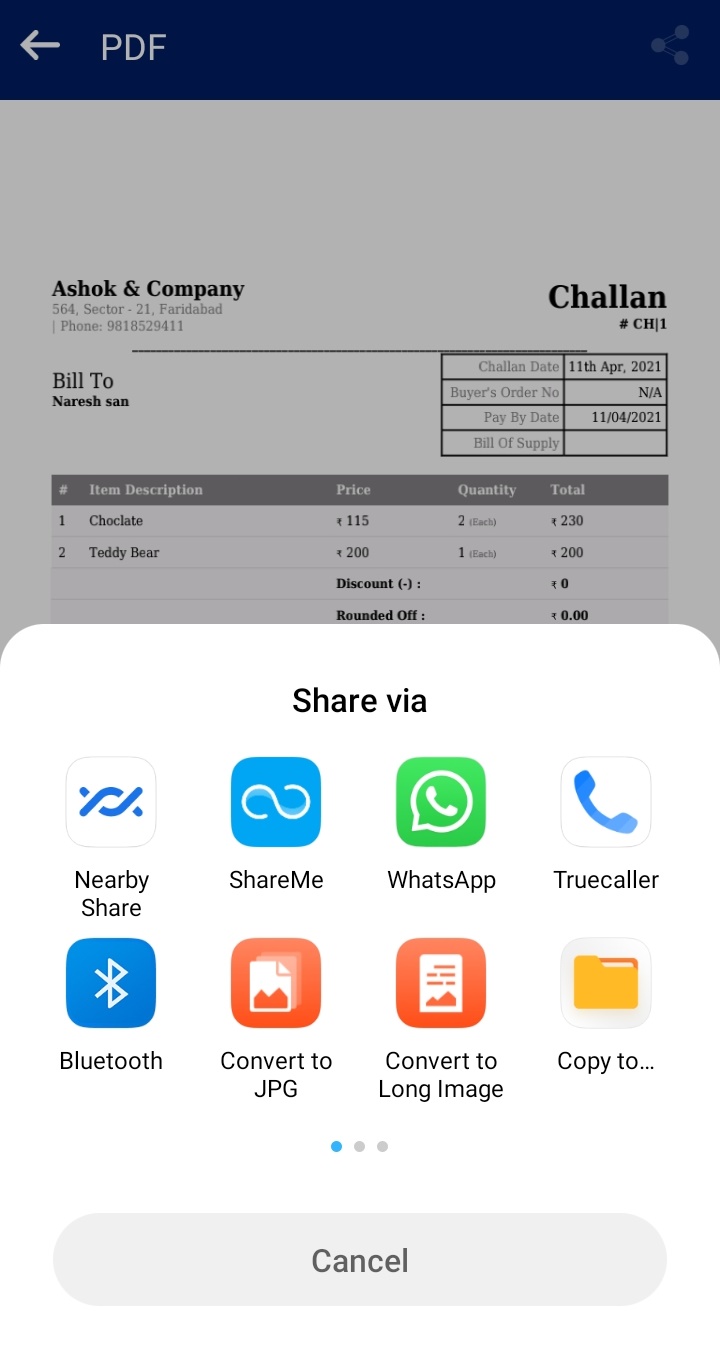
You can also share the pdf of the bill to your customer thru whatsapp, email etc.
Option to Print bill on 58mm/80mm thermal printer is coming soon. You can buy your own printer or you can order us. We will let you know when the printing option goes live.
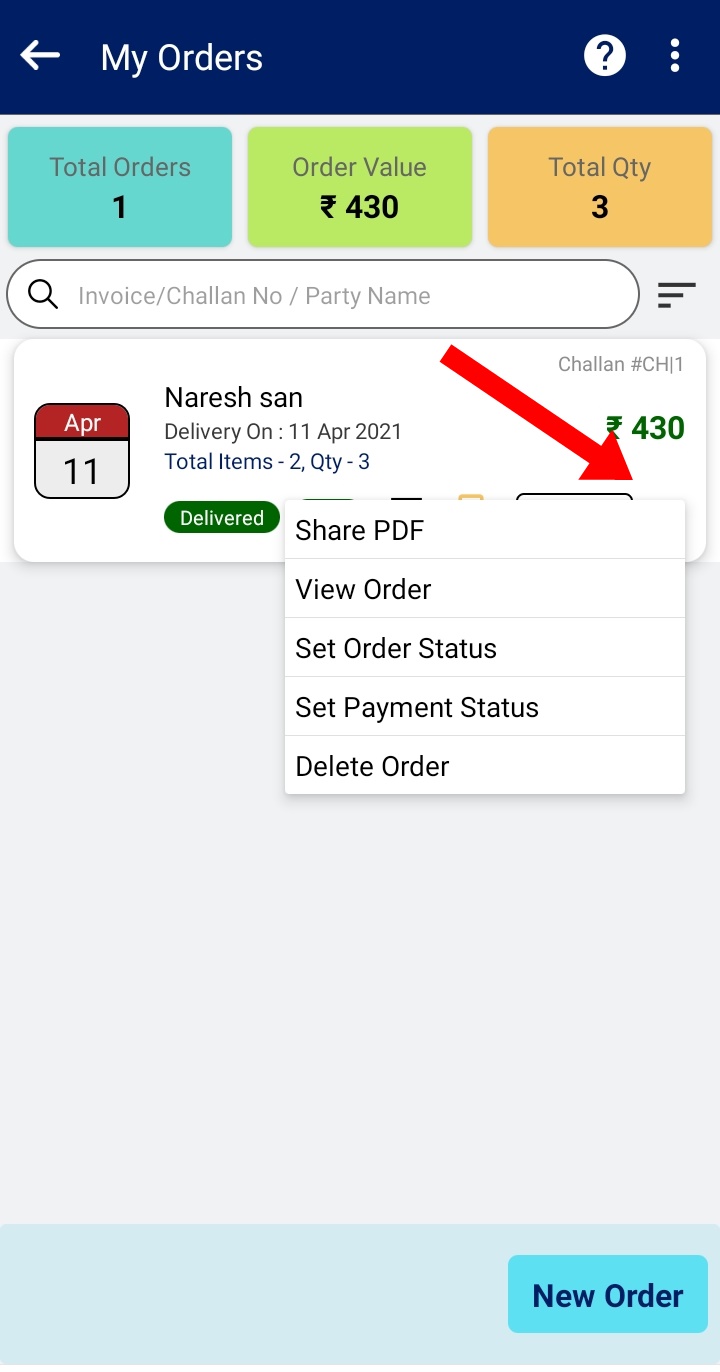
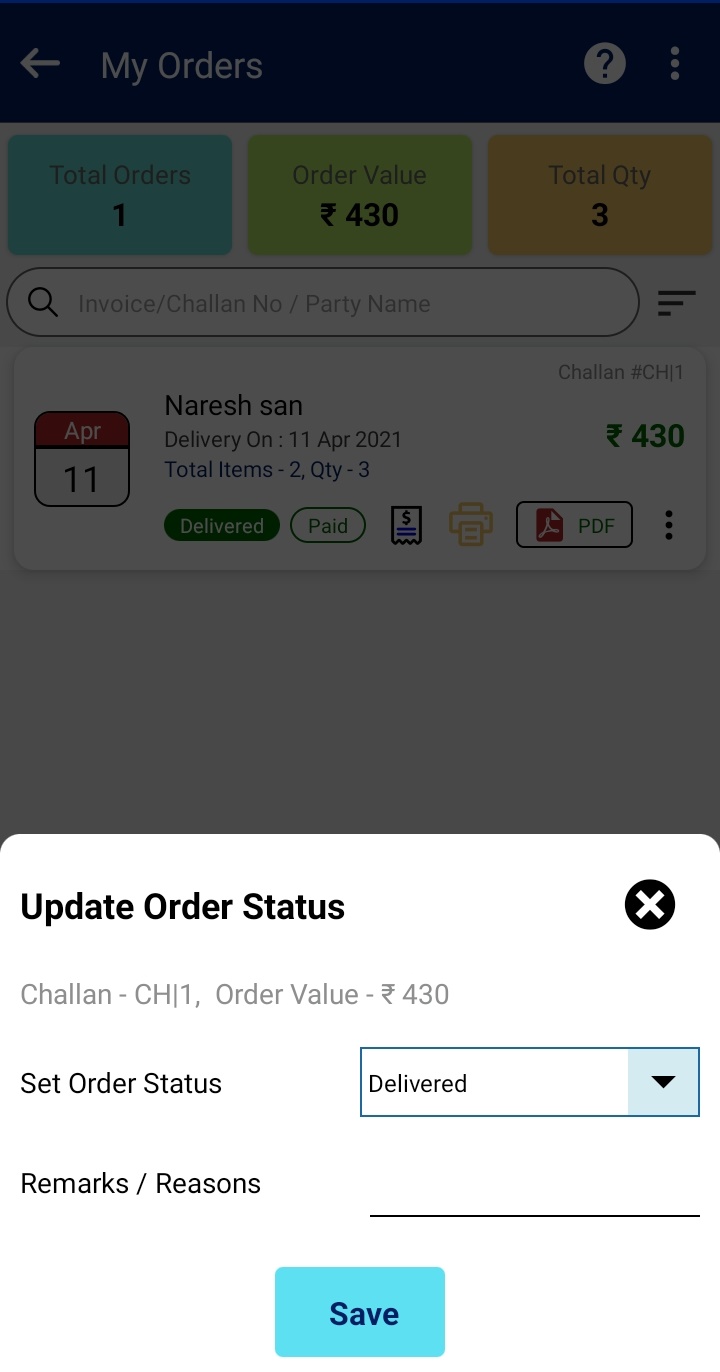
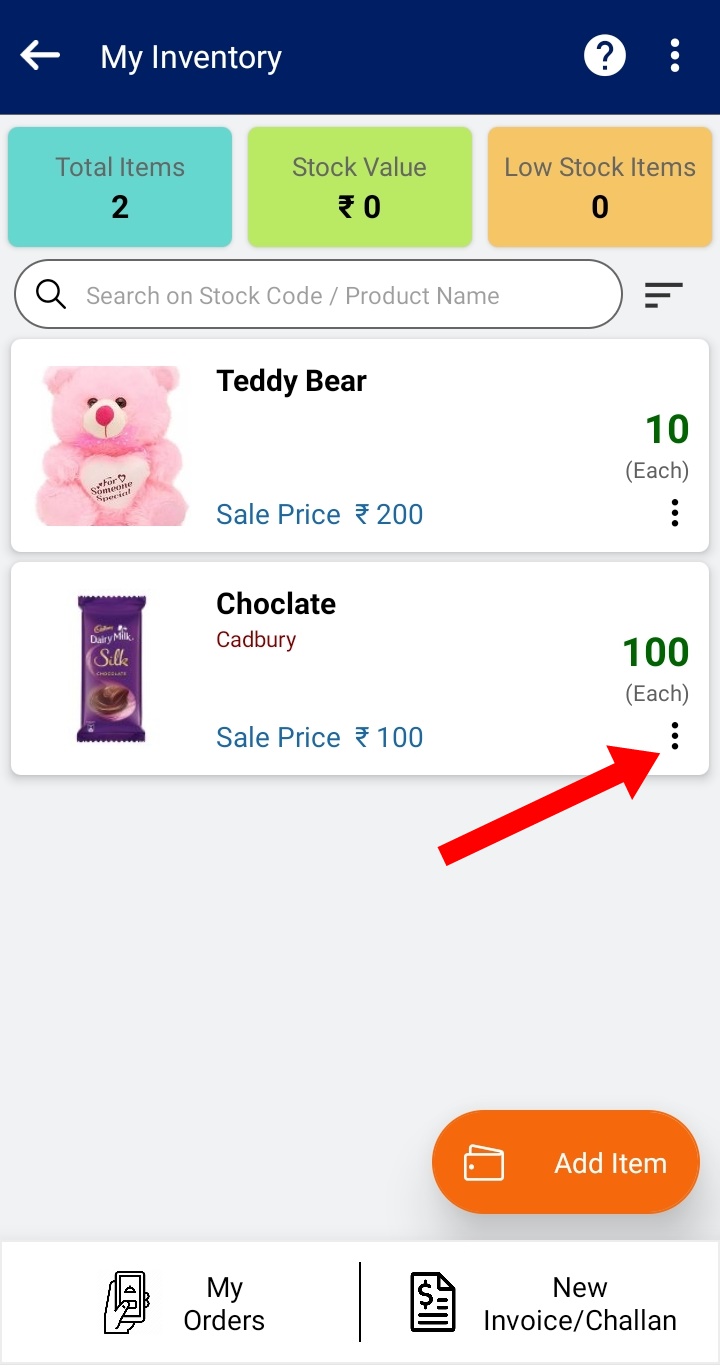
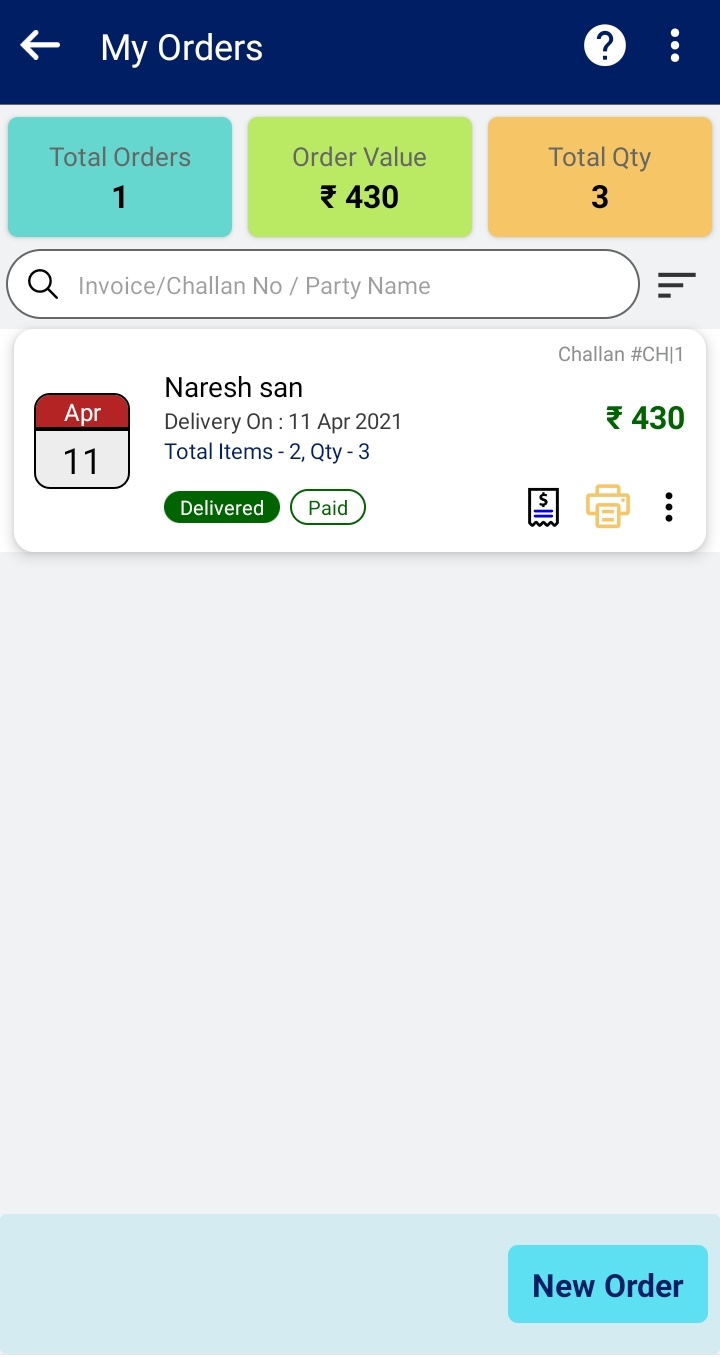
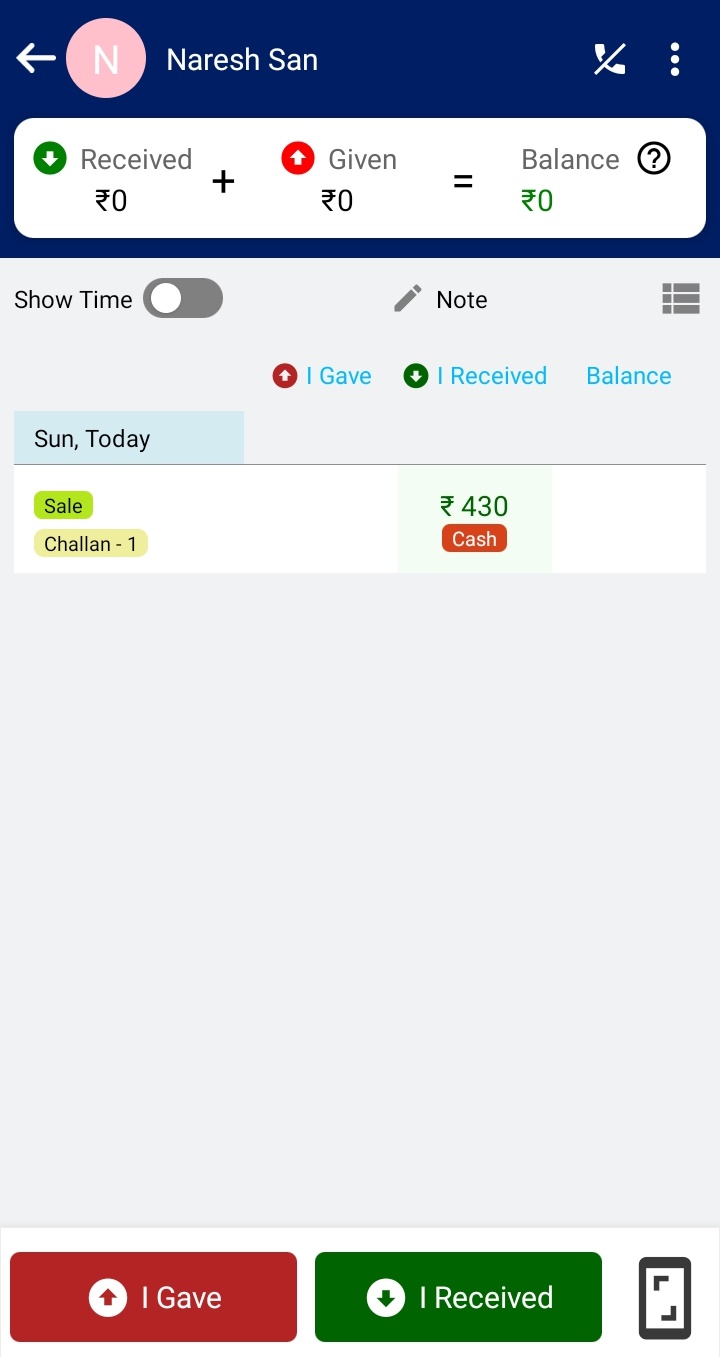
View order, Change Order Status, Set Payment for the existing order
Go to Order and tap on three dots. It will show a pop-up menu and you can select the option you want.